

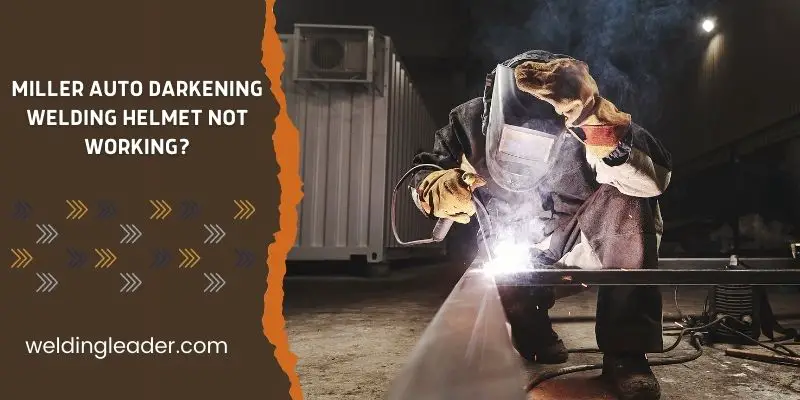
It disappoints you if the miller auto-darkening welding helmet does not work. There may be some minor issues with your helmet that you know how to fix quickly. Sometimes, the solution does not work and the auto-darkening helmet gradually stops working. In this case, you need to investigate the problem through subtle tests.
A Miller auto-darkening helmet is widely preferred by users for smooth and safe welding work. In addition to welding, it also plays a vital role in protecting the eyes from the ultraviolet rays of the sun. So, you may not want it to lose its ability to work due to lack of care.
Miller auto-darkening Knowing and solving potential problems with helmets can help you get back on track. However, this article will explain the reasons and symptoms why the Miller auto-darkening welding helmet does not work and the solution.
Reasons Why Your Miller Auto Darkening Welding Helmet Are Not Working With Fixes:
Since the Miller auto-darkening welding helmet is designed with a combination of different parts, it cannot work due to the inefficiency of these parts. The following table shows the reasons and symptoms of not working:
| Reasons | Symptoms |
| Low visibility | Can’t see out |
| Battery Issue | Too much darkening |
| Helmet gets loosen | Uncomfortable feeling |
| Weld is so bright | welding looks very bright |
| Poor battery | Lights flickering |
| Eye Clasp | Headaches after working |
6 Ways To Fix Your Miller Auto Darkening Welding Helmet: It’ll Work Again
After noticing the problems mentioned in the Miller auto-darkening welding helmet, you should know the ways to solve them. Find out the solution for each problem below:
1. Low Visibility: Clean Or Replace Your Helmet
There are several reasons why welding helmets lose their visibility. Find out the reasons. It could be for not cleaning the helmet for a long time, and a lot of dust and dirt accumulates in the helmet, which reduces the outside visibility. In this case, you can take the time to wash and clean the helmet.
This may not be the final solution if the problem is different. The lens may have lost its effectiveness as a result of prolonged use. Replace the lens, not just the lens or helmet cleaning solution.
2. Battery Issue: Repair Or Replace The Battery
Your Miller helmet may suddenly become too dark at work. This usually happens if there is a fault in the battery. However, this is not such a problem that you cannot solve. Try repairing the battery first. The battery may not always be available for repair.
If that doesn’t work, the battery probably needs to be replaced. Too dark a helmet means you’re stuck at work. So the helmet will be almost useless until the battery is repaired or replaced.
3. Helmet Gets Loosen: Make It Tight
At times, you may feel that the Miller helmet is not working properly. One of the reasons for this is that something is wrong with the helmet that does not make you feel comfortable. If any part of the helmet is loosened, it will make you uncomfortable in the middle of work. The solution is to stop working for a while and tighten the helmet.
Then start working by recharging it. If you face the same problem again, think about replacing the helmet. Undoubtedly the Miller is a popular brand, but it is not impossible to have flaws in any of them at the time of creation, which unfortunately came into your hands.
4. Weld Is So Brighter: Use Shades
The light may look too bright during welding. It can be scary. Excessive brightness at work will make you feel annoyed. Miller auto-darkening welding helmet has different shades for ease of operation.
If you use the wrong shade, it may be too dark, or it may reveal extreme brightness of the weld. But, this is not a complicated problem. Just pick the right shade before starting to weld.
5. Lights Flickering: Change The Battery
The reason for the light flickering off the miller welding helmet is that there is an error in your battery. The only solution is to replace the battery. Battery repair will not give you any good results. It can be frustrating for you to have any of the Miller helmet’s parts damaged.
You may not be able to find a replacement battery in any welding equipment store. Because these are not available in local stores. Miller’s battery is strong enough, but it must be replaced due to light flickering.
6. Eye Clasp: Reduce The Reaction Time
Another problem you may encounter while using a miller helmet is that you feel that the helmet has lost its usability. Also, you will feel a strain on the eyes, which may cause your headaches later. But in fact, it is not the fault of the helmet.
There is a solution to this too. In this case, you need to reduce the reaction time. If the response time is too long, the reaction of your helmet will also be slower. So, it will take time for the required layer of darkness to start. The reaction speed is enough to be 1 / 10,000 seconds.
4 Easy Steps To Test If A Welding Helmet Is Working Or Not:
It is uncomfortable for the helmet not to work during welding. So in some steps, you can know in advance whether your Miller auto-darkening welding helmet is working.
Step-1: Examine The Fitness
The first step in checking if your Miller helmet is working is to check its fitness. There is no doubt that these helmets are always light enough to weigh, but then see if it is easy. If it is too loose, the lens may move during welding.
Again, it is not good to tighten the helmet with your head. It cannot hold your comfortable mood. Once you have verified that the helmet is compatible with your head, you can start working after finishing it.
Step-2: Test In The Sunlight
Another significant step in testing the effectiveness of your Miller helmet is to examine it in sunlight. The lens of a miller welding helmet varies from 8 to 14 shades. Knowing how much it adapts to the intense sunlight will give you an accurate idea of whether it is working or not.
If you have no problem looking at the sun with a helmet, your eyes are safe, and the helmet is perfect for starting welding. Also, go in the dark and see if its lens is changing.
Step-3: Viewing Capability
Notice if your lens is damaged. Maybe it was caused due to inadvertently putting the helmet on, or any stain on it due to rubbing. Remember that you cannot do welding using a faulty lens.
It will force you to look ahead. If you notice that the lens is not suitable for viewing the front functions, it is recommended you change the lens as soon as possible.
Step-4: Eye Discomfort
If you have ever had eye problems with a Miller welding helmet, this is a must-have. In addition, if you find any reason during the test that does not allow you to see the front thoroughly or clearly, you have to decide on the helmet.
If it has a battery problem, it will allow extra light to enter through the lens. Moreover, if the lens is not wide, you will not be able to see well in front.
Related Questions About The Working Issues Of Miller Welding Helmet:
How Do You Reset A Miller Welding Helmet? (6 Steps)
To reset the Miller auto-darkening welding helmet, you need to go through a few steps. Take a look at the steps below to make your job easier:
Step-1: Remove AD lens from helmet,
Step-2: Reduce sensitivity to 0,
Step-3: Remove batteries,
Step-4: Press the auto on/off button for 10 seconds,
Step-5: Put new batteries into the filter,
Step-6: Turn the lens on.
How Do You Know If Your Miller Welding Helmet Is Bad?
There are several simple ways to find out if your Miller welding helmet is bad or not. It is better to test it before working since it does not make you feel comfortable in the middle of work. Not fitting in, not seeing the lens properly or noticing spots, not automatically changing the lens shade when looking at the sun, etc. are the signs that your helmet is bad.
These problems are easily solved. However, it is necessary to change or replace it to solve the problem caused by the battery fault.
How Do You Change The Battery In Your Miller Welding Helmet?
Once the Miller welding helmet loses its effectiveness, it demands a replacement. Below are just a few vital steps that you need to know to replace a battery in a helmet:
Step-1: Remove the lens’ congregation frame with a little pressure on the grip.
Step-2: Find the battery tray and take it out of the junction.
Step-3: Change the old lithium battery to a new one.
Step-4: Now put the open parts back in place.
Step-5: Turn on your helmet to test battery power. If it performs well without any problem then all is fine.
It is advisable to read the manual guideline carefully before starting the whole process of battery replacement.
Can You Repair A Miller Welding Helmet On Your Own?
Miller Auto Darkening helmets usually have problems that you can solve yourself because they are not so complicated. It is possible to repair it by following the correct instructions. Most of the helmets do not work due to poor battery conditions.
Repair the battery, if it doesn’t work, replace the battery. There are only a few steps to change the battery of a helmet that allows you to do it easily.
Final Words
There are several serious reasons why your miller auto-darkening welding helmet is not working, naturally, this can be a matter of concern. This article gives you a brief overview of fraudulent miller welding helmets.
Hopefully, these will be helpful enough for you. Now, maybe your Miller helmet will be easier to repair since you know the effective ways to do it. Moreover, your awareness is also crucial which warns you about various problems.
You may also want to read: