

The first time you weld, it is natural to ask how to weld thin metal with a stick welder. Since you will be doing thin metal welding, it may burn during stick welding. The main problem is that it generates a lot of heat during welding.
Knowing the correct process of stick welding will make your job easy to do thin metal welding. I promise you that you will know the whole process of thin metal welding with a stick welder. I am sure that after reading this article all your misconceptions about stick welding will come to an end.
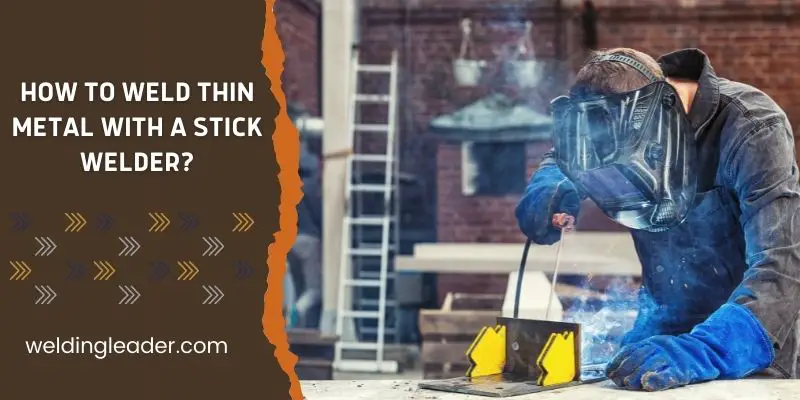
This article describes the process step by step of how to weld a piece of thin metal welding with a stick welder. After reading this article, you are going to know everything about thin metal welding with a stick welder.
7 Steps Of Thin Metal Welding With A Stick Welder:
Knowing the full process of stick welding will enable you to weld a piece of thin metal well. Below I have described the full process step by step of thin metal welding.
Step-1: Tools & Protective Materials
Welding is a sensitive job. So have the necessary tools and protective equipment before welding. Before you stick with welding, consider the following tools and protective equipment:
- Welding Mask;
- Stick Welder;
- Stick Electrodes;
- Welding Helmet;
- Welding Jacket;
- Welding Gloves;
- Safety Glasses;
- Ear Protection;
- Steel Toe Shoes;
- Chipping Hammer or Brush;
- Voltage Reduction Device (VRD);
- Fire Extinguisher;
Step-2: Choose Stick Electrodes
There are different types of stick electrodes used for different metals. Since you will be doing thin metal welding, you have to choose the Stick Electrodes that match it.
Each stick electrode has its classification code stamped on it. By looking at this code, you can know all its features. Each carbon steel electrode has a 4 digit code. Since you will be doing thin metal welding, the most suitable stick electrode code for this is E6013. The following points will explain E6013 in detail. Let’s have a look!
- Here “E” means electrode. Each code of Stick Electrodes has this E at the beginning.
- The first 2 digits indicate the extension of the electrode. It indicates how much weight it can bear. This tensile strength is roughly between 60,000ksi and 70,000ksi.
- The 3rd digit indicates position. There can be only three numbers in this position. If there is “1”, it can be used in all positions. If there is “2”, it can be used in flat and horizontal positions. If there is “3”, it can only be used in a flat position. But most of the time there is “1”.
- The 4th digit expresses current usage and flux coating. This number varies the most.
Step-3: Choose Electrode Holder
There are only two types of holder options for placing electrodes in a stick welder. The first is a square or twist lock, and the second is a pinch. There is not much difference in work. The difference is in just watching.
When inserting the electrode, you can set the angle at the electrode exactly as you want. You can place the electrode on the head of the holder and rotate it clockwise.
Step-4: Select Polarity
In the case of stick welding, you can work on both positive and negative polarity. It is very easy to set up. All you have to do is write everything about the setup in the electrode box. Set up the welder as you read it. If you do not understand, then follow the text below.
- If you want to connect AC / DC + to the electrode, attach the earth clamp to the negative (-) panel mount. Then, attach the torch to the positive (+) panel mount.
- And if you want to connect AC / DC – then attach the earth clamp to the positive (+) panel mount. Then, attach the torch to the negative (-) panel mount.
Since you will be doing thin metal welding, you should use a direct current electrode negative (DCEN or DC-). This will produce less heat in your thin metal. This melts the electrode faster, so you can do welding faster on the joint. As a result, your thin metal will absorb less heat and the metal will not melt.
Step-5: Settings & Amperage
To do thin metal welding, you need a special set of stick welding. The setting is not too complicated, but you have to find the right amps.
- The number of amps depends on the thickness of the electrode you are using. Again the thickness of the electrode depends on the thickness of your base metal.
- If the thickness of your thin metal is 4 mm, then you can use a 2.6 mm dia electrode. It would be better if the code of the electrode is 6013.
- With the code of this electrode, you should set amps between 60 and 65. If your amps setting is not correct, you will easily understand it.
- Additionally, if you find a 1.6 mm thin diameter electrode with E6013 code, set it to 20-40 amps.
- If you feel extreme pressure and it is sprayed everywhere, you know that amps are too much.
- And if the pressure is felt less and there is no fusion between the electrodes, it indicates that the amps have decreased. If the amps are low, the electrode will stick to the metal.
You can easily control the voltage with the Voltage Reduction Device (VRD). The machine can easily set the required voltage.
Step-6: Clean The Workpiece
In stick welding, there is no problem if there is dirt with metal. Since you are going to do thin metal welding, clean the dirted place to get better results.
- Clean the metal joints and place the clamp. If there is rust, paint, or something similar with the joint, they act as electrical insulation.
- Clean the dirt with a chipping hammer or brush. If the place of the joint is clean, it will help to avoid slag inclusions.
Arc does not start easily if there is dirt. For dirt, you will not get stability when welding.
Step-7: Start Your Welding
Your welding machine and electrodes are ready. Now, you are ready to start welding your thin metal. However, when welding a piece of thin metal with a stick welder, you have to consider three things.
- Work Angle: You have to balance the angle of welding with the angle of your joint. Decide what type of angle to do the welding at any position.
If you are in a vertical position, you have to increase the speed of travel. It can protect against molten metal droplets. You have to reduce amps to reduce travel speed. A flat position is best during stick welding.
- Travel Angle And Distance: Always use the welder at a pull angle when stick welding. Using the push angle, the electrode holder is likely to get stuck in the slag. This can contaminate your thin metal. When welding, the welder’s electrode holder should be at a 45 ° angle. Keep turning the welder’s torch over the joint.
If we use a 2.6 mm electrode when welding a piece of thin metal, the pressure length should not exceed 3 mm. If the electrode gets too close to the metal, it may get stuck. Again, moving the electrode too far away from the metal can cause your arc to become unstable.
- Travel Speed: Whichever method of welding you follow, your travel speed should be consistent. If you need a thick weld, slow down the travel speed. Since you are doing thin metal welding, it is better to travel faster. This relieves the metal from melting.
In the case of stick welding, firstly you have to burn the arc. Then, scratch your thin metal with the electrode where you will be welding. Move quickly with little force. Pull the electrode as you scratch the metal. Do not move the electrode too far, do not move too close again. Continue welding while maintaining a certain steady speed.
What Are The Problems of Thin Metal When Welding With A Stick Welder?
Be careful when welding a piece of thin metal. As the metal is thin, a little mistake is enough to create a big problem. Below are some examples of the problems that can occur during stick welding.
- High Risk Of Burn: If your metal is thin, it is likely to be burnt. This can happen due to high amps. Metal can also be burned due to uninterrupted slow motion. Often the edges of the thin metal are unable to conduct heat, causing the thin metal to burn in the heat of the arc. If the heat is too high, thin metal pores can form.
- Deformation Of Metal: Deformation of metal occurs if heat fluctuates unevenly during stick welding. Due to the thinness of the metal, it cannot absorb much heat. This results in rapid distortion. However, you can control the heat by tacking frequently. You have the ability to resist the compressive strength of the metal.
- Heat Affected Zone (HAZ): The heat-affected area is the area around the beads. This area is affected by heat. This (HAZ) depends on the temperature. You can minimize this when welding any thin metal, but it is not possible to avoid heat-affected areas. No matter how efficiently you weld, it is not possible to avoid HAZ.
- Too Much-Deposited Metal: In stick welding, the molten part of the electrode starts to accumulate on the metal at a constant rate. If the amount of filler metal deposits is high, the joint of thin metal will look bad.
You will remove excess metal at the end of welding. However, if an excessive metal is removed, the joint is likely to be weakened. Make sure that the joint is not weak. Be careful when using grinder teeth.
7 Easy Tips To Weld A Piece Of Thin Metal With A Stick Welder:
You know everything about stick welding. Now if you follow these tips, you will be able to weld better. You can also use the tips for other welding methods.
- Tip-1: You can practice a little before you start welding. During practice, you will be able to understand if all the settings are correct.
- Tip-2: A long arc can damage your thin metal. Long arcs can cause your main goal of welding to fail.
- Tip-3: Welding cannot be done in a chaotic environment to avoid tripping over and falling. You have to have a proper welding environment.
- Tip-4: As you will be doing thin metal welding, the stick welder should not be overheated. Excessive heat will melt the metal.
- Tip-5: Since your metal is thin, keep your stick welding machine on a low setting. You can use small electrodes and the electrode moves fast.
- Tip-6: If you are concerned about the proper joint geometry of your thin metal, you can do proper welding by marking the proper joint geometry.
- Tip-7: Keep your thin metal at your level so that you can easily weld. The stick welder can move freely and steadily.
Related Question About Thin Metal Welding By A Stick Welder:
What Is The Thinnest Metal That You Can Weld With A Stick Welder?
If you can control the heat well, you will be able to do thin metal welding. The thinnest metal that you can weld with a stick welder is 1/16 ″ (1.6mm). You can do thin metal welding of more than 1.6mm if you are experienced. In addition to the experience of doing thin metal welding, you must use good electrodes.
What Power Supply Is Necessary For Thin Metal Stick Welding?
The necessary power supply for thin metal stick welding is direct current (DC). Direct current (DC) is more effective for thin metals. With DC you can do smooth welding, which is not possible with AC.
More amps are required for alternating current (AC). In direct current (DC), you can do welding using a minimum of 20-40 amps. Alternating current (AC) is not as stable as DC.
What Is The Function Of a Chill Bar For Welding Thin Metal By Stick Welder?
You can use this chill bar to trap thin metals during welding. It is possible to use chill bars made of copper and aluminum, even better metals. Chill bars are very effective in absorbing high heat. You can use steel bars, it is cheaper.
However, steel chill bars do not give better results than aluminum or copper. This chill bar can be 1/8 ″ (3.2 mm) thick. But the thicker you use the better. Clamp this chill bar very tightly with your thin metal. These bars are now ready to absorb a large portion of heat.
What Techniques Are Used To Stick Weld Thin Metal?
You have to give your best to do thin metal welding. Thin metal welding does not require much welding. It is possible to make thin metal joints with a little welding. When you add more volume filler to the metal, your thin metal may become distorted.
You have to finish your welding quickly with a little break. Early welding reduces the risk of thin metal. If your thin metal joint is too long, do not weld non-stop. If you are welding non-stop at a long joint, the whole workpiece becomes hot.
Final Thoughts:
I’m sure now you understand how to weld thin metal with a stick welder. To gain better skills in thin metal welding, you have to practice more and more. Although it is very difficult to create a well-formed joint or prevent deformation completely. You can reduce this distortion rate by following the tips and tricks described above.
You may also want to read:
